22 Best Garden Edging DIY Ideas to Instantly Upgrade Your Outdoor Space
Creating garden edging DIY style is one of the most satisfying ways to give your yard a finished, professional look without spending a fortune. Whether you have a small backyard or a wide lawn, edging helps define boundaries, control weeds, and add beauty. The best part? You can do it yourself with a little planning and creativity. Let’s explore 22 inspiring ideas that bring life and structure to your garden edges.
Brick Border Charm

Classic brick edging never goes out of style. The uniform shape of bricks allows you to create smooth curves or clean straight lines around flower beds and walkways. Bricks are durable, weather-resistant, and easy to install—just dig a narrow trench, set the bricks at an angle or upright, and pack soil around them.
For a more artistic touch, consider mixing red and grey tones or laying bricks in a herringbone pattern. This small detail makes your garden edging DIY project look intentional and timeless. It’s also easy to repair or expand later if you add new planting areas.
Stone Edging Elegance

Natural stone edging gives your garden a rustic and earthy look. You can use fieldstones, river rocks, or flagstones depending on the design theme. Stones blend beautifully with greenery and provide excellent durability against weather.
To achieve the best results, dig a shallow trench and set each stone securely into the soil. You can fill gaps with gravel or sand. The uneven surface of stones makes each border unique—ideal for gardeners who love an organic, natural finish.
Wooden Log Borders

Using small logs or reclaimed timber adds a warm, countryside feel to your garden. This type of edging works perfectly for vegetable gardens or cottage-style landscapes. Logs can be laid horizontally for a low border or vertically for a more defined wall.
If you treat the wood with a sealant or linseed oil, it can last for years despite exposure to rain and sun. This garden edging DIY idea is eco-friendly too—you can reuse fallen branches or scrap wood from other projects.
Metal Edging for a Modern Touch

Metal edging brings sleekness and durability to any yard. It’s especially effective in contemporary gardens where clean lines are key. Aluminum or steel strips are flexible enough to curve easily yet strong enough to hold soil in place.
You can install metal edging using stakes or clips. It’s low-maintenance and resists rust for years. The metallic shine adds contrast against soft plants and mulch, giving your garden an elegant, designer-grade finish.
Concrete Borders

Concrete garden borders are tough and long-lasting. You can pour them in place using molds or buy precast edging stones from a hardware store. Concrete lets you shape curves, angles, and even decorative textures.
If you want to customize your garden edging DIY, tint the concrete with pigments or stamp patterns for visual interest. It’s ideal for driveways or areas that get heavy foot traffic.
Plastic or Rubber Edging

Flexible plastic or recycled rubber edging is lightweight and easy to install—perfect for beginners. These rolls bend easily to outline flower beds or pathways, and most come with anchoring stakes.
They’re water-resistant, affordable, and available in several colors. If sustainability matters to you, choose rubber edging made from recycled tires; it’s both eco-friendly and durable for years of use.
Gravel Trenches

A gravel trench edge works wonders for drainage while creating a crisp separation between the lawn and garden bed. It’s inexpensive and quick to make. Simply dig a shallow channel and fill it with decorative gravel or crushed stone.
You can pair this with metal or brick borders for added definition. The sound of crunching gravel underfoot also adds sensory appeal to your garden.
Upcycled Bottle Edging

For a quirky twist, use old glass bottles to line your garden edges. Collect bottles of similar height, bury the necks in soil, and let the colorful bases face upward. Sunlight shining through the glass creates a stunning effect.
This garden edging DIY project is both creative and sustainable. It’s perfect for eco-conscious gardeners who enjoy repurposing materials in fun ways.
Terracotta Pot Edging

Broken or old terracotta pots don’t have to go to waste. Place half-buried pot rims in a row to form a rustic border. Their warm, earthy color looks beautiful beside herbs and flowering plants.
Over time, moss may grow on the pots, enhancing their charm. This method gives your garden a Mediterranean feel and costs almost nothing if you reuse old pots.
Pallet Wood Strips

Reclaimed pallet wood makes excellent edging material. Cut the planks into uniform lengths, treat them against moisture, and set them vertically into the soil. The variation in tones gives a natural, handcrafted look.
Pallet edging works great around raised beds or vegetable patches. It’s a simple garden edging DIY idea that supports sustainability while adding rustic charm.
Bamboo Garden Edging

Bamboo edging introduces an Asian-inspired aesthetic. You can buy pre-made rolls or create your own using bamboo canes tied together. It’s flexible and works beautifully along curved garden lines.
Bamboo is lightweight, renewable, and naturally insect-resistant. To ensure longevity, coat it with a weather-resistant sealant. It complements tropical plants or minimalist garden designs perfectly.
Rope or Twine Borders

A rope edge gives your garden a nautical or cottage feel. Use thick jute or sisal rope to mark the boundary of flower beds. Secure it with wooden pegs for a soft yet defined look.
It’s a low-cost and temporary edging solution, ideal for renters or seasonal setups. The rope’s texture adds an interesting contrast to smooth lawn grass.
Tile and Mosaic Edging
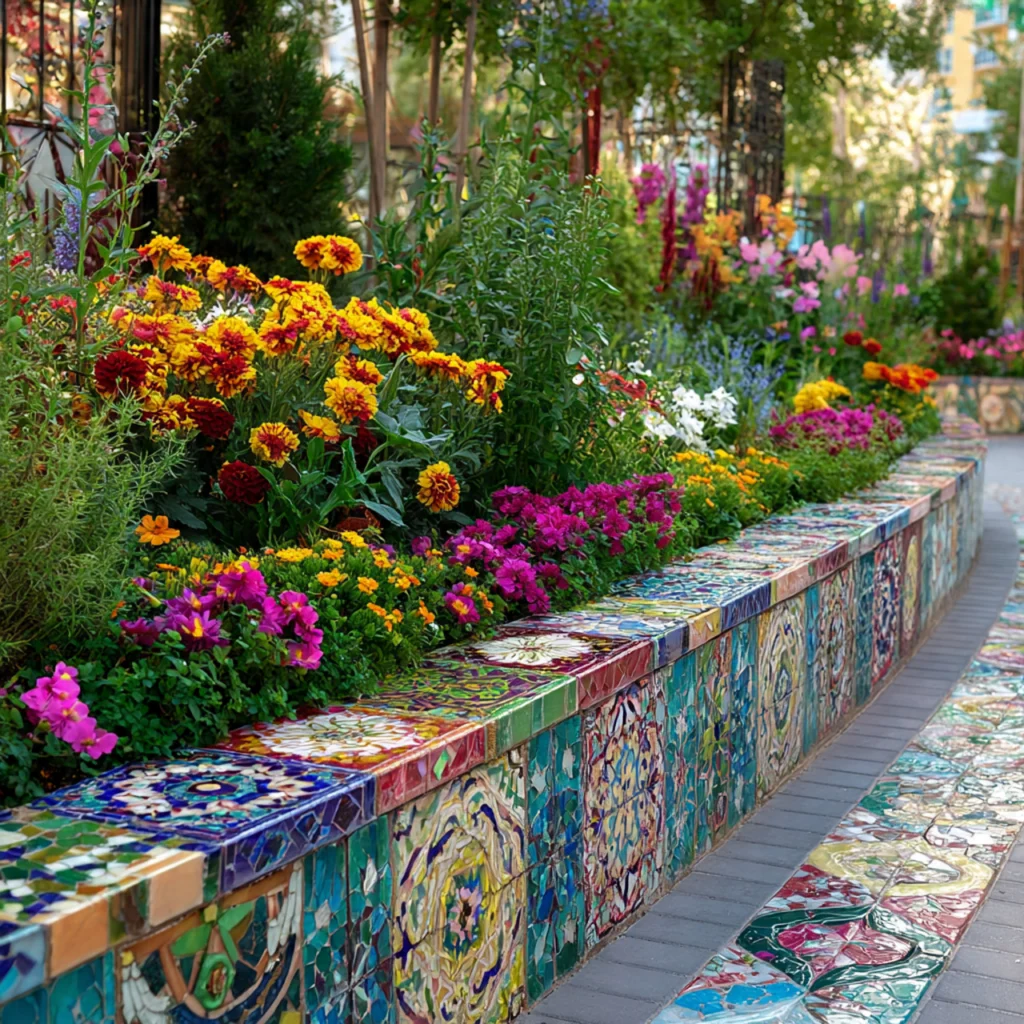
Ceramic or mosaic tile edging brings color and creativity into your garden. Reuse broken tiles or purchase decorative pieces to create a unique border. Arrange them in patterns or random designs for an artistic finish.
This garden edging DIY idea doubles as a fun weekend craft. It’s great for smaller gardens, patios, or courtyards where visual detail stands out.
Living Plant Edges

Instead of hard materials, try planting low-growing shrubs or herbs like lavender, thyme, or boxwood to form a living border. This natural edging softens the look of pathways and adds fragrance to your garden.
You’ll need regular trimming to maintain shape, but the results are worth it. A living edge merges seamlessly with nature and keeps your garden looking lush year-round.
Landscape Timber Edging

Landscape timbers are solid, treated wooden beams often used in larger garden projects. They’re excellent for creating raised beds or defining pathways.
Lay them horizontally and secure with long spikes. They last for years and provide a structured, clean appearance that suits modern or rustic landscapes alike.
Woven Willow or Branch Edging

Woven edging made from willow or flexible branches adds a handcrafted, organic look. It’s ideal for cottage or woodland gardens.
You can weave the branches between short stakes to create a low fence effect. This garden edging DIY idea is as beautiful as it is practical, and it allows air and water to flow freely around your plants.
Recycled Brick and Stone Mix

Mixing leftover bricks and stones adds variety and texture. It’s a budget-friendly way to use what you already have at home.
The contrasting shapes and colors make each border unique. Add gravel between the gaps to enhance stability and drainage.
Edging with Garden Tiles

Garden tiles come in many styles—from terracotta squares to patterned concrete pavers. Set them side-by-side to form tidy edges along pathways or flower beds.
Tiles are easy to clean and withstand all weather conditions. They’re perfect for creating a neat, low-maintenance garden border.
Recycled Plastic Lumber

Eco-friendly gardeners will love recycled plastic lumber. It mimics wood but never rots or splinters.
It’s an excellent long-term investment for garden edging DIY projects, especially in wet climates. The smooth finish and variety of colors make it versatile for both modern and traditional landscapes.
Shell or Pebble Borders
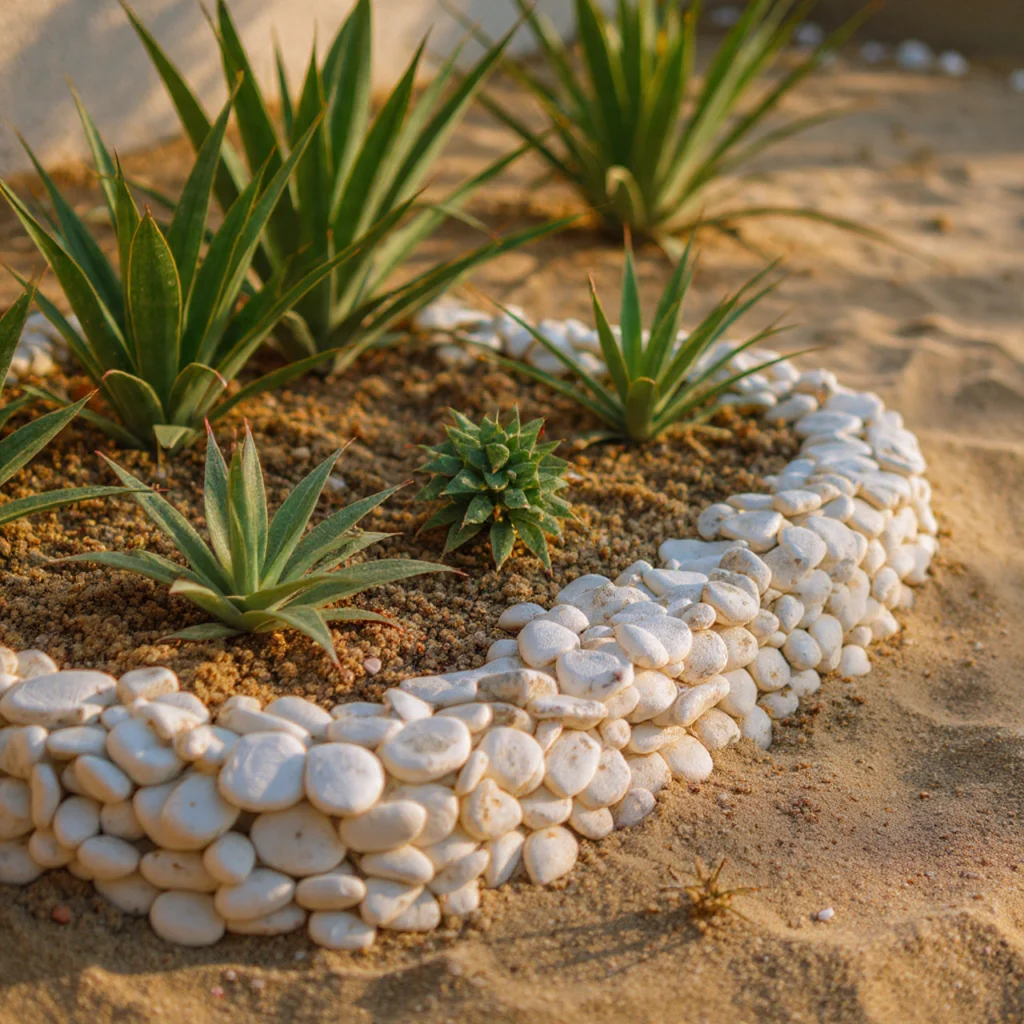
If you live near the coast, collect shells or smooth pebbles for a beach-inspired border. Their natural shine adds a calming, coastal touch.
Arrange them tightly to prevent weeds from poking through. It’s a simple, meditative way to add beauty to your yard while keeping maintenance low.
Mulch Borders

Using mulch as edging keeps the soil moist and discourages weeds. You can create a subtle border by piling mulch thicker along the garden edges.
To keep it in place, use a shallow trench or flexible edging strip underneath. Mulch edging looks natural and works well in organic gardens.
Concrete Paver Edging

Concrete pavers offer structure and uniformity. They can be installed flat for a pathway edge or upright for a raised boundary.
Their clean lines make garden maintenance easier by separating grass and soil neatly. Pair with decorative stones or plants for contrast.
FAQs
Q1: How deep should garden edging be installed?
Most edging should be buried about 3–4 inches deep to prevent shifting and to block grass roots from creeping into flower beds.
Q2: What’s the cheapest garden edging DIY option?
Plastic rolls, gravel trenches, or recycled materials like bottles and old bricks are among the most affordable yet effective choices.
Q3: How can I stop weeds from growing along the edges?
Lay down landscape fabric under the edging and add a layer of mulch or gravel to block sunlight and discourage weed growth.
Q4: Which edging lasts the longest?
Concrete, metal, and recycled plastic lumber typically offer the longest lifespan with minimal maintenance.
Q5: Can I install garden edging DIY without digging?
Yes, flexible rubber or plastic edging can often be pegged into the soil surface if digging isn’t possible, though it may be less stable long-term.
Conclusion
Transforming your garden with a bit of garden edging DIY not only refines its appearance but also enhances its function. With materials ranging from natural stone to recycled bottles, there’s a style and budget for everyone. The beauty of doing it yourself is that you can shape, customize, and adjust your borders to match your evolving garden. So grab your tools, gather your materials, and start designing edges that frame your outdoor masterpiece with pride and creativity.


